
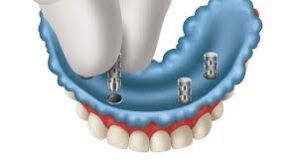
Placing implants under dentures involves many visits and the patient feels the dentist keeps changing pieces, so what exactly is the dentist placing? What are the parts that comprise an overdenture?
1- First part is called a fixture, often referred to as the implant as well. It is a piece of titanium rod placed into the jaw bone. It represents the tooth root. It comes packed sterile. The top part of the implant is attached to a “fixture mount” which is used only to carry the fixture from its sterile packaging into the jaw bone. The fixture itself must not touch anything, it goes from the package to bone.
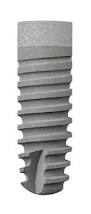
The fixture comes in various sizes, varying in width and length. The size used is determined by many factors, most important being bone condition. Studies show long term success with smaller implants, but if there is room we try to stick to the bigger implants in Central Coast.
Once the implant is placed in the jaw, the implant mount is unscrewed from the implant.
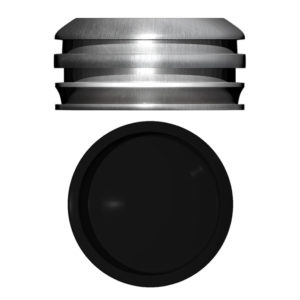
2- Now we have a fixture placed in the jaw. The next piece to be used is called gingiva former, or healing cap. It gets screwed into the implant. The function of it, as the name indicates is to force the healing of the gum around the neck of the former, resulting in a tight seal and forming the gums to receive the final abutment.
The cap is meant to protrude through the gums. The stitches go around it. The patient goes home with the cap showing through.
3- After the implant has deemed to be ready to receive the final restoration, which is between 6 to 12 weeks, the dentist will unscrew the healing cap.
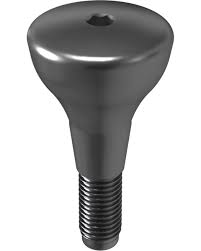
The next piece to be used is called a definite abutment. The abutment is supplied with various heights. The one that just emerges out of the gum by 2mm is screwed to the implant.
4- An impression is needed to represent the implant, dentures, and tissues, in exact relation to each other. A piece called impression coping is placed onto the abutment. The denture is drilled to cut a hole where the abutment is located.
The denture is used to take the impression.
Once the impression material is set, the dentures are taken out. It pulls out the impression coping out of the abutment.
The coping comes out half buried in the impression.
5- An abutment analogue is used next. It clicks to the coping. It represents the abutment. A plaster model is fabricated by pouring the impression. This gives a replica of the mouth with abutments.
6- A matrix , which is a dome shaped metal piece, holds a plastic piece inside, called Replacement male. It clicks onto the analogue on the model.
The dentures are cleared of the impression material. It is placed on top of the model with the matrix. Pink plastic, acrylic, is cured to cover the holes of the dentures and adheres to the matrix, saving its location. Once set, we have a denture with a matrix and a replacement male inside it. It clicks to the abutment in the mouth securing the denture in place.
Conclusion:
Replacing a missing tooth with an implants involves many pieces. These pieces are manufactured to fit precisely, eliminating the error as much as possible.